The ‘Jeff’ – finale!

Well, in typical millinery fashion, just when you get all excited that a hat is ready to finish, it turns out it’s nowhere near close to completion.

For my lining of the Jeff, I had chosen this very English Liberty print from the Tana Lawn collection.Pretty…

Liberty lining for the Jeff

I had a few choices with the lining. Do a standard lining job – or block the lining to match the inside shape of the hat. Naturally, I went for blocking, which added a few hours onto the proceedings. As with the cord, the lining fabric was cut on the bias and blocked to the shape of the block used for the hat.

As with the fabric for the actual hat, the lining was blocked in two pieces, top and side – the two were stitched together on the sewing machine, and excess fabric cut off. It is important to remember when blocking the lining of your hat that you have to turn the fabric upside down, otherwise the ‘wrong’ side of the fabric will show on the inside of your finished hat.

The final lining stages - Jeff

I sewed the seams of the lining on the machine, and then placed it into the hat. Stitching the lining to the hat exterior was tricky – as the same block has been used for both, the two fabrics will not fit perfectly inside each other – the lining will always be a tad too big. So, when sewing, it’s best to just keep the fabrics as flat as possible against each other and take time as you sew to adjust, to avoid any big gathers in the fabrics, especially at the end.

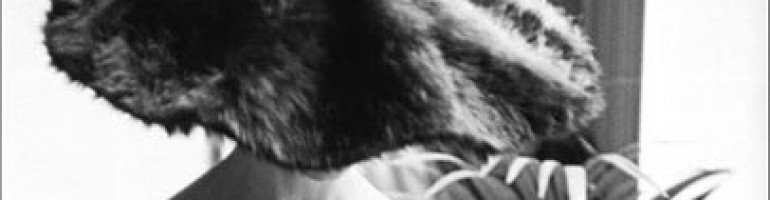
Finally, after much perseverance, here is is!

The Jeff

3 Comments

Filed under Skills

The ‘Jeff’ – Vol II

Right, so we left of with the ‘cap’ part of the Jeff flatcap finished, so on to the body of the hat. As a reminder, our block for this project was the Guru’s classic cap block.

The body of the hat was to be made in two parts. Firstly, the ‘ribbon’, which is the piece of fabric that runs around the head, and secondly the top of the hat which holds everything together (‘ribbon’ and cap).

To make the ribbon, I measured the circumference of the broadest point on the block, and cut two bias strips. Using the aforementioned careful ironing technique, I ironed the fabric to some stayflex (this comes in black or white) and then attached the two pieces together on the sewing machine (to form symmetrical side seams at the temple of the hat).

Jeff  ‘ribbon’ , with stayflex

Sewing the two parts of the ribbon together required the use of a sewing machine – tres fun! Although my abilities with sewing machines were near to zilch, they soon improved and very little unpicking was required.

Once the two pieces were symmetrically sewn together, it was time to block, starting from the back. I pinned the top of the piece in four places (usual method of front, back, side and side) to keep in place and put pin in the botton front first so that it would not move around and twist the side seams.

Jeff – body blocking

With help from the Guru, I blocked the bottom part of the fabric first, just over the block collar, leaving plenty of fabric to use as a seam later on.

Next, the top of the fabric was blocked. This required a lot of ‘gentle’ force, to make sure the fabric was blocked evenly all round. Fabric blocked, I then steamed it and left to dry.

Whilst the ribbon part of the hat was drying into shape, I cut a bias strip of fabric for the top. Removing the now dry ribbon, I blocked this, covering as much of the top of the block as possible. I made sure the pile was going from front to back – hats should always be lighter at the front (the effect of going with the pile) and darker at the back (against the pile) – this has always been the rule, so even though I’m not sure I understand… I went with it.

Top fabric blocked, it was steamed and left to dry. The next step was to sew the two together. The ribbon was pulled gently over the top – very carefully, as piled fabric is very keen to move and slip around. Once placed correctly, it was sewn into place using an invisible stitch.

A few notes:

  • Cord/velvet – never, ever touch when wet or right after steaming. It will leave a mark that won’t go away
  • Positioning the two pieces: a little bit of moving around and rough calculating of where the cap will go is needed. Unfortunately, there is no exact method for this, just trial and error.

And here it is, Jeff, stage 2. Next time, the beautiful lining, and final touches.

x

Jeff – ribbon and top of hat

3 Comments

Filed under Uncategorized

The ‘Jeff’ – English flatcap, Vol I

This milliner is also a journalist – as you can imagine, the link between the two isn’t that obvious, so I needed a hat to bridge the gap between my two worlds. Also, I needed some fabric hat experience; the Guru advises that making a fabric hat is imperative for developing couture millinery skills.

Andy Capp

Inspired by one of the most popular newspaper cartoons (and a bit jealous of the man’s Barbour cap that is too big for me), I ventured to make a classic British flat cap.

First, the fabric; I am not a fan of cheque, unless it’s really chic. So I went for a 100% cotton velvet cord, in a lovely coutnryside forest green.

To get started, I was lucky that the Guru had the right block – she, too, is a classicist, so we went for the very basic gentleman’s flatcap shape with the block

Block chosen, it was swiftly put to one side, as the first steps of the flatcap making actually involve mainly the ‘cap’ part of the flatcap.

The cap is made very much like a couture headband. Using tarlatan, stayflex interfacing and millinery wire (medium, as it’s for the brim effectively).

First I cut out some fabric using a pattern, drawn out by roughly tracing around the cap part of the block.

Jeff: Cap, stage 1

Then, I ironed on the interfacing and tarlatan (allowing a 1-2cm seam allowance all round), and attached a wire to the brim and covered with the outside seam of the fabric, like so (stage 1).

In order to allow the curve of the cap to join to the rest of the hat, I cut 5mm indents into the inside part of the brim. I was careful to stitch a guide, so that the indents didn’t go too far in.

Jeff cap, stage 2

Finally, it was time to cover the inside of the cap with the matching fabric. Using the same pattern, I cut out another piece of the fabric and lined the inside with interfacing (ironing very carefully, as the fabric had a pile which could easily lose it’s shape). The result was then stitched to the rest of the cap, using an invisible stitch (stage 2).

Once both sides of the cap were covered, it was time to iron it using the special velvet board. The technique for this is as follows: instead of your traditional ironing by arm stroke, just softly place the iron onto the cap and lift every now and then, so as not to damage the fabric pile by sweeping the iron around. Any indents/creases in pile fabric are usually not fixable and, especially in this case, would be on the front and, therefore, most visible part of the hat.

Vintage velvet board

Et voila, Jeff’s cap finished! Stay tuned for Jeff, Vol II.

Jeff cap, final

x

1 Comment

Filed under Skills